Inviting a tenant to the portal
Creating a tenant record doesn’t give them a login — that’s a deliberate, separate step, usually taken once their lease exists.
1. Send the invite
Section titled “1. Send the invite”Go to Communications > Tenant Invites and click New Invite:
- Tenant
- Send via — Email, Text message, or both. Nothing is preselected, so pick at least one before the invite can be created.
- Invite email — shown when you pick Email, prefilled from the tenant’s record, editable
- Invite phone — shown when you pick Text message, prefilled from the tenant’s record
and editable. US numbers can be typed however you like; for anything else, start with
+. - Lease — pick theirs, or No lease yet if it isn’t created yet
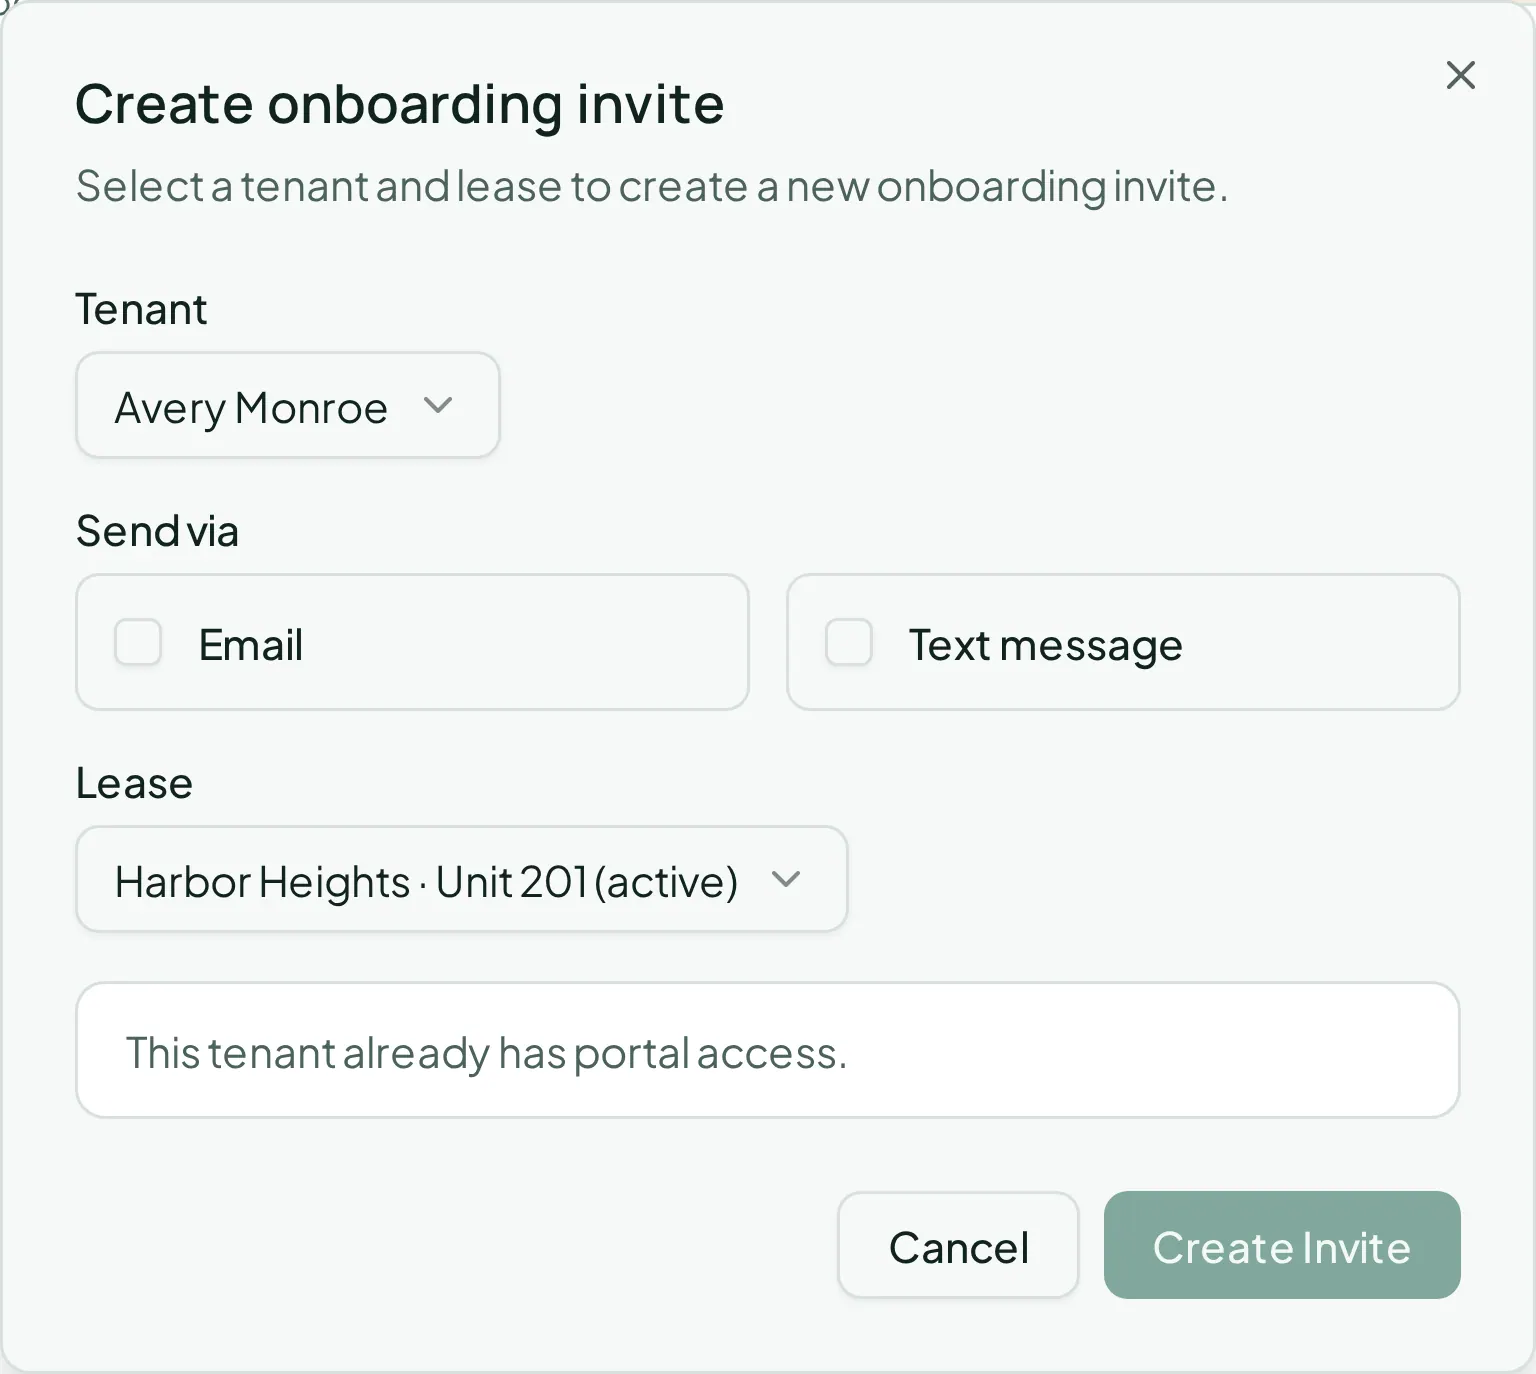
Click Create Invite. A Latest invite link panel appears with a Copy button — useful if you’d rather hand the link to the tenant directly instead of relying on the message going through.
A texted invite carries a short link rather than the full one, so it fits comfortably in a single message. That short link expires along with the invite and stops working the moment the invite is revoked or accepted. Texts are transactional, identify Vespy as the sender, and tell the recipient they can reply STOP to opt out.
The button is grayed out with an explanation if the tenant already has portal access or an already-accepted invite pending.
2. The tenant accepts
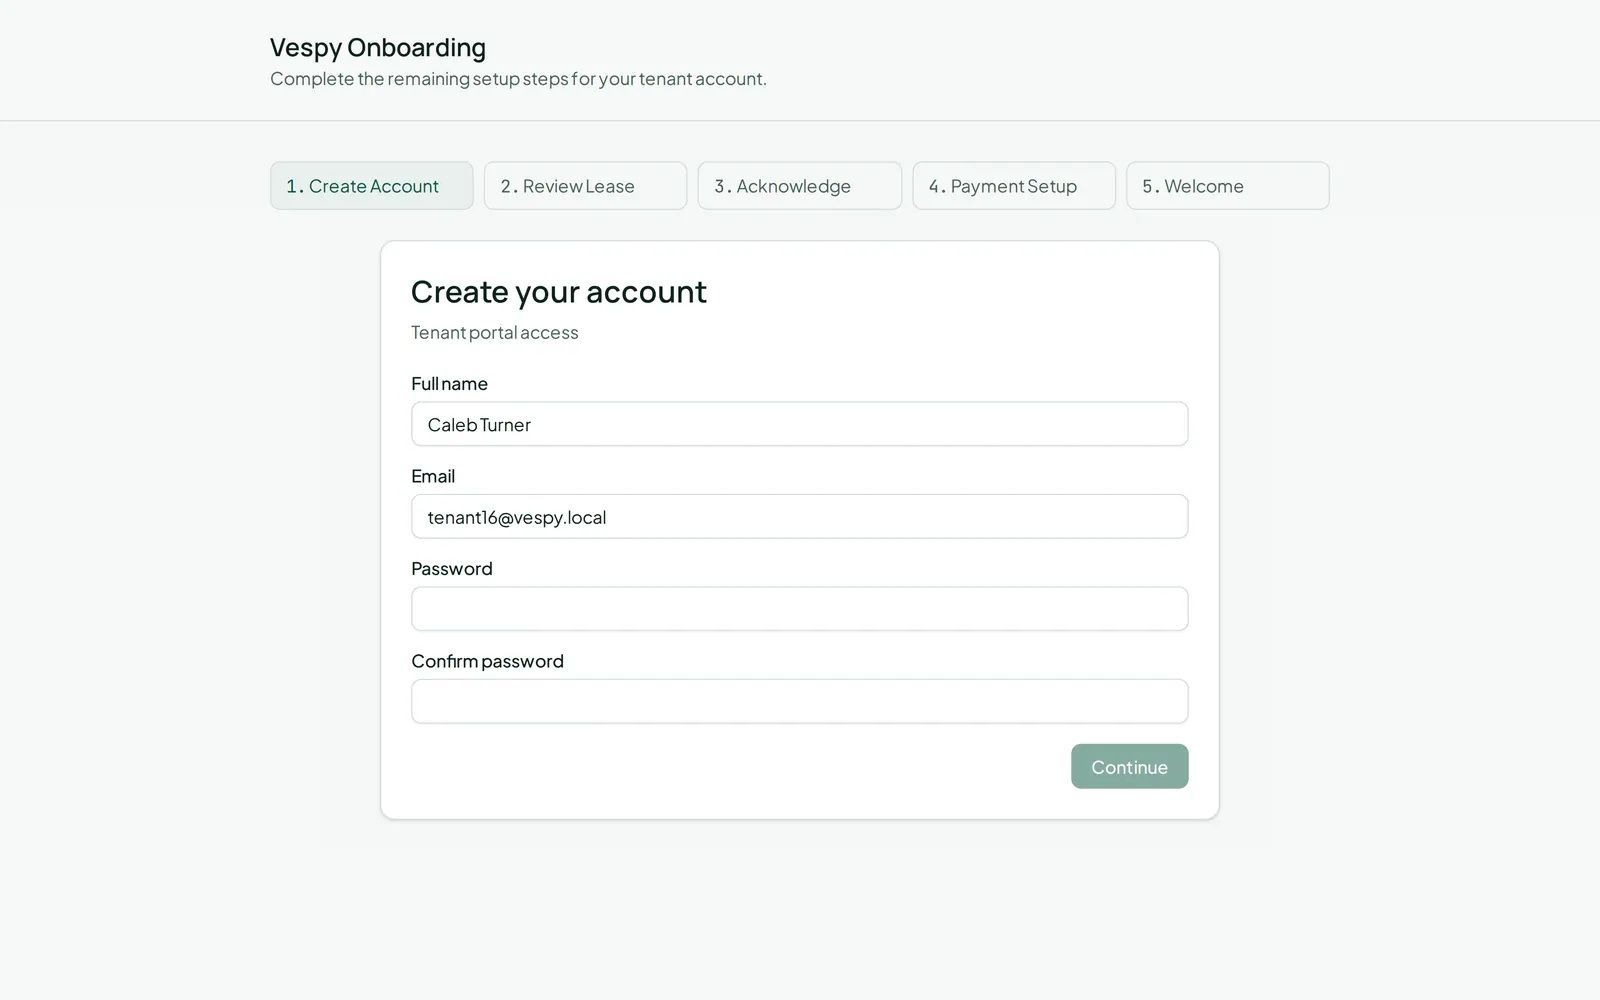
Section titled “2. The tenant accepts”The tenant clicks the link, sets a password, and walks through a short setup — reviewing their lease and, if you’ve enabled it, setting up a payment method. None of this requires anything further from you.
3. Manage outstanding invites
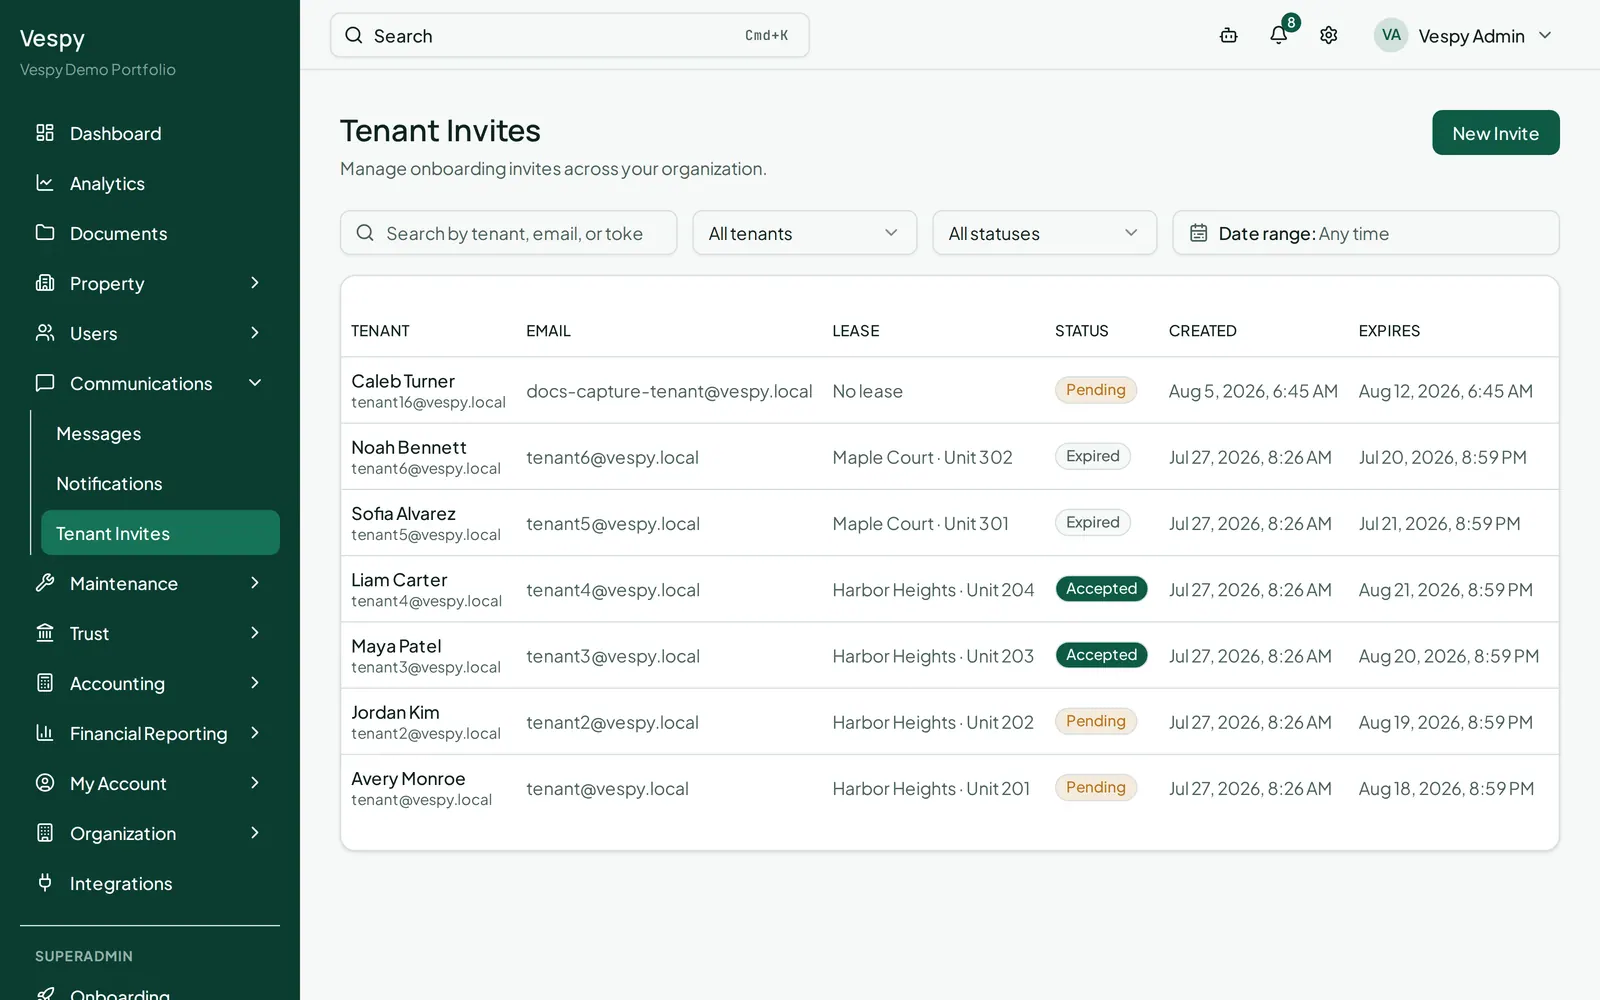
Section titled “3. Manage outstanding invites”The Tenant Invites list shows every invite’s status, when it was created, when it expires, and whether it’s been accepted or revoked. Each pending invite has Copy Link and Revoke buttons — revoke one if it’s gone stale and you want to send a fresh one.
What the tenant can now do
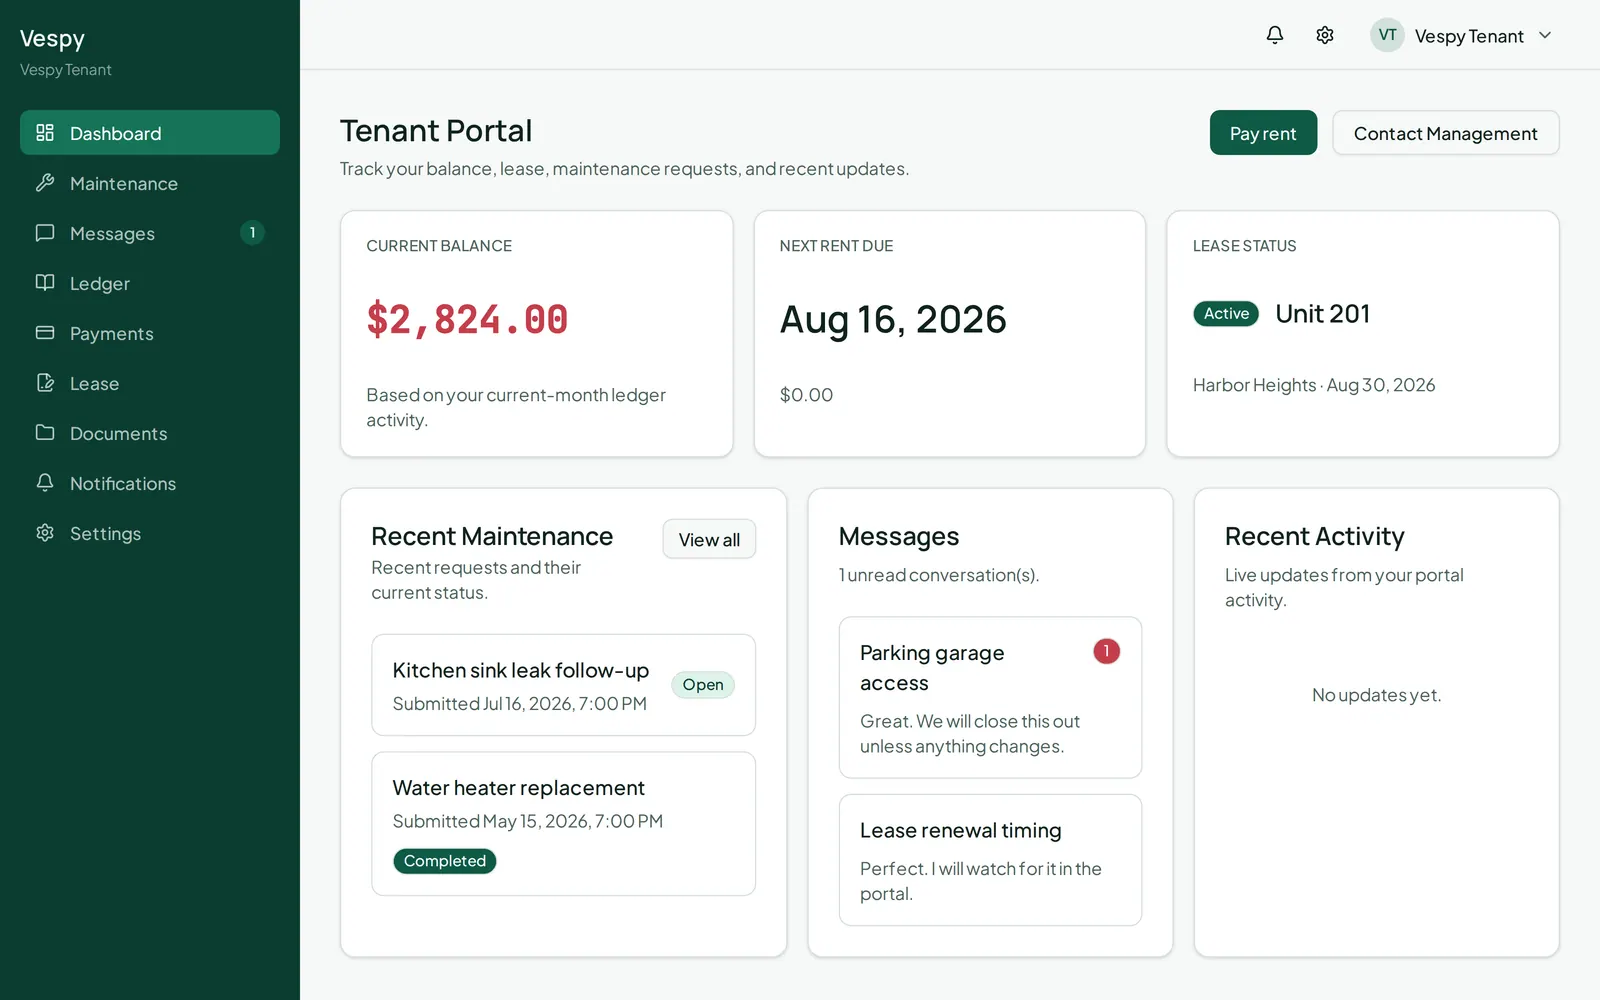
Section titled “What the tenant can now do”Once they’ve accepted, the tenant has their own portal with:
- A dashboard showing their lease and balance
- Their full payment history and running balance
- A way to file and follow up on maintenance requests
- Documents you’ve shared with them
Afterwards
Section titled “Afterwards”- Billing rent and collecting payments — the tenant can see this the moment they log in.
- Managing maintenance requests — what happens when they file one themselves.