Managing the document library
Every document you upload anywhere in Vespy — a lease, a certificate of insurance, a receipt — lands in one central library, whether or not you attached it to a specific record.
1. Upload a document
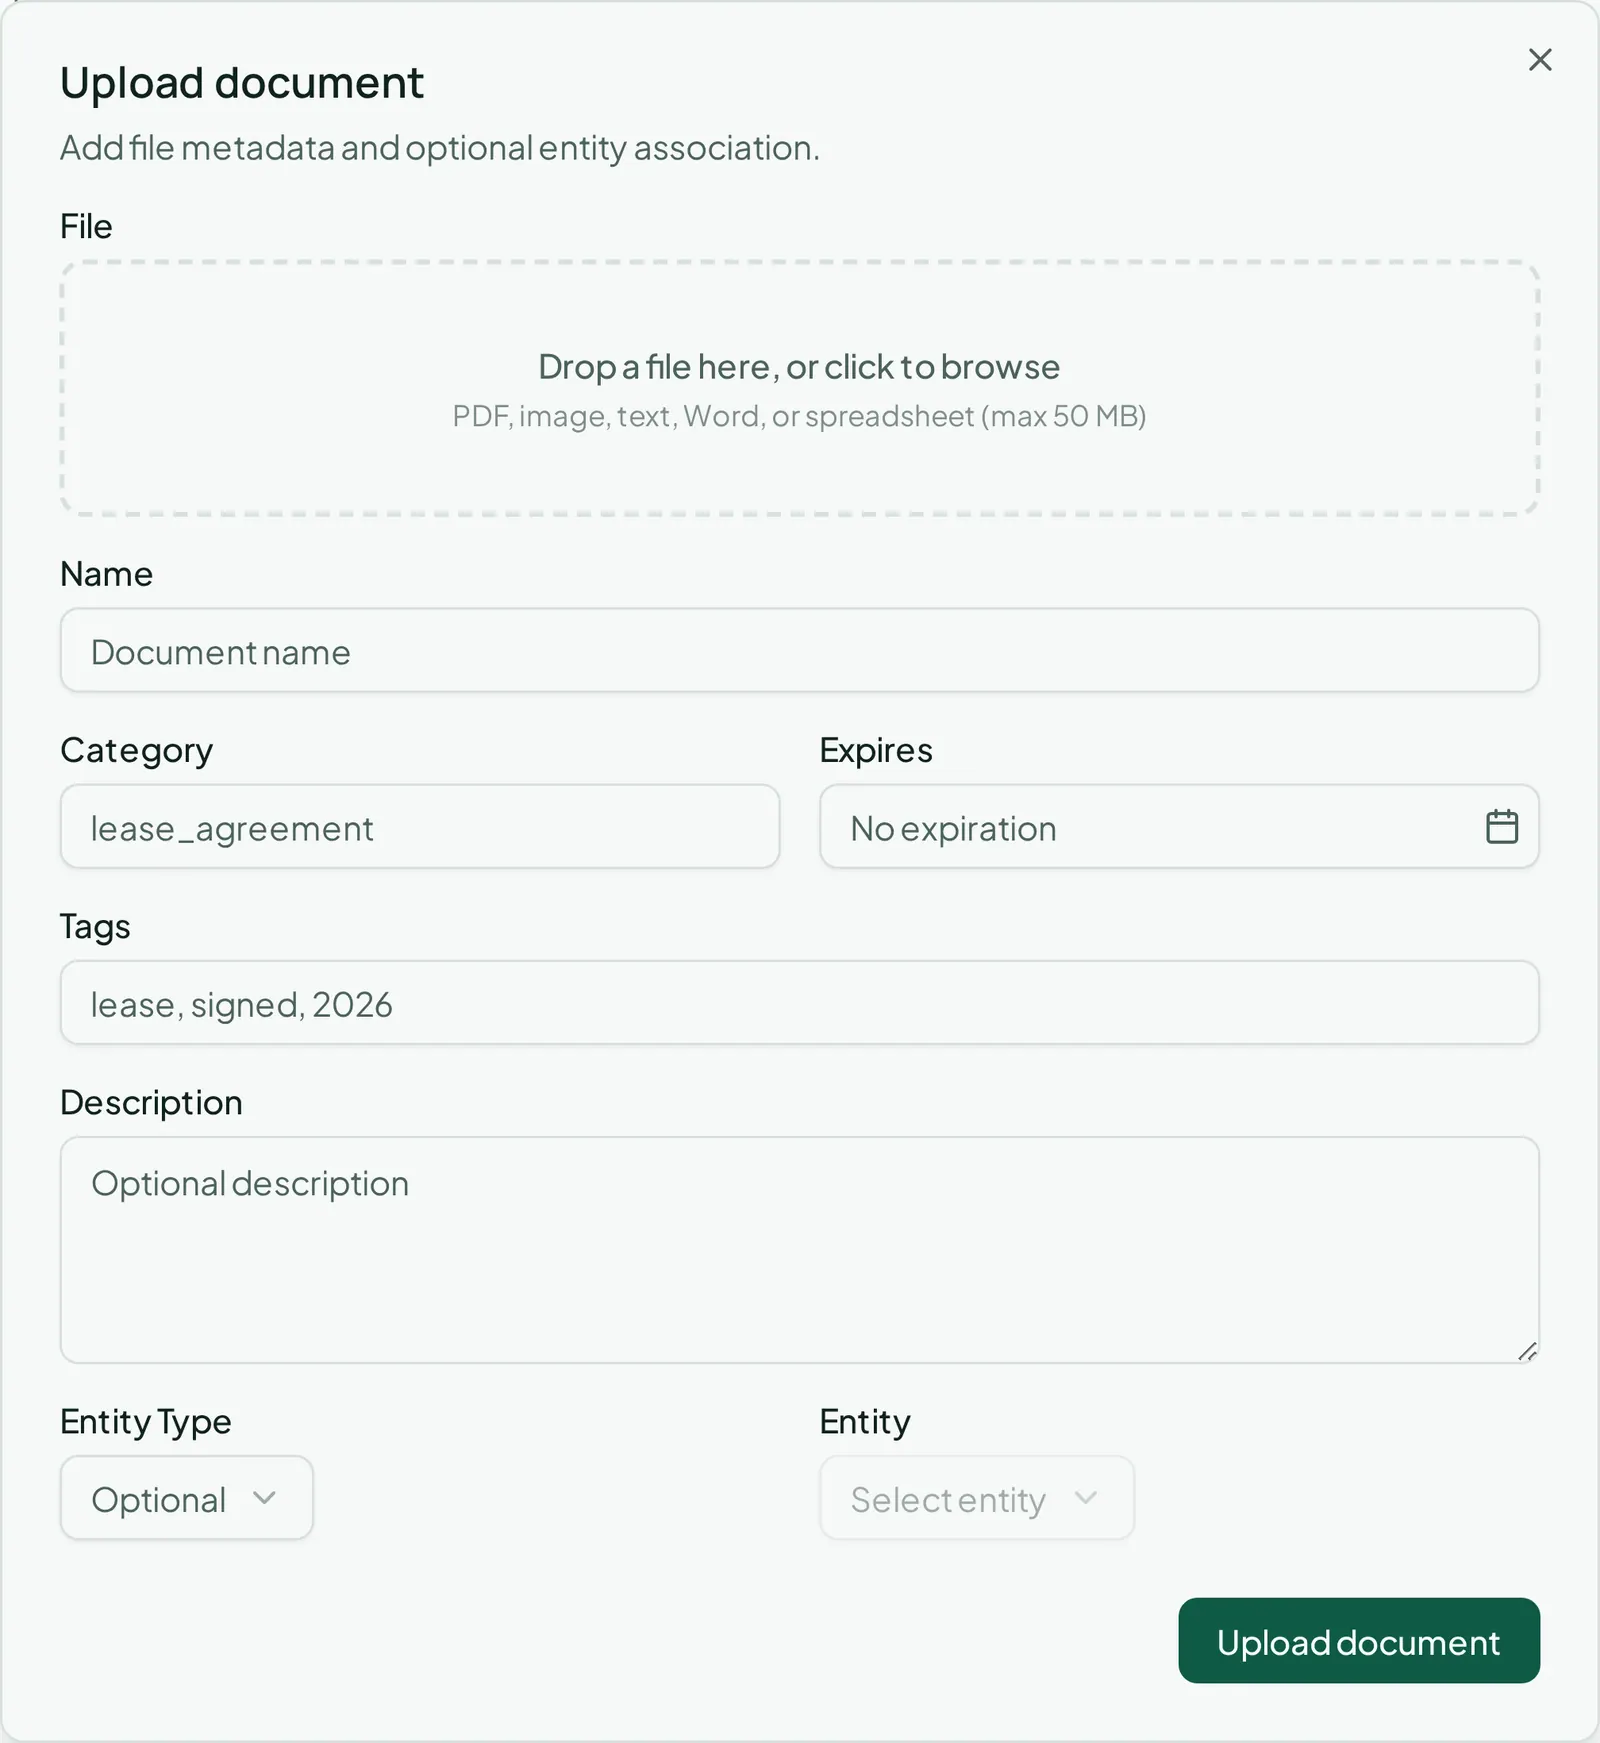
Section titled “1. Upload a document”Go to Documents in the top navigation and click Upload document:
- Drag a file in, or use the file picker
- Name
- Entity association (optional) — link it to a property, unit, tenant, owner, payment, expense, lease, vendor, or work order. If you got here from that record’s own page, this is already filled in for you.
- Category, Tags, Description, Expiration date — all optional
2. Find something later
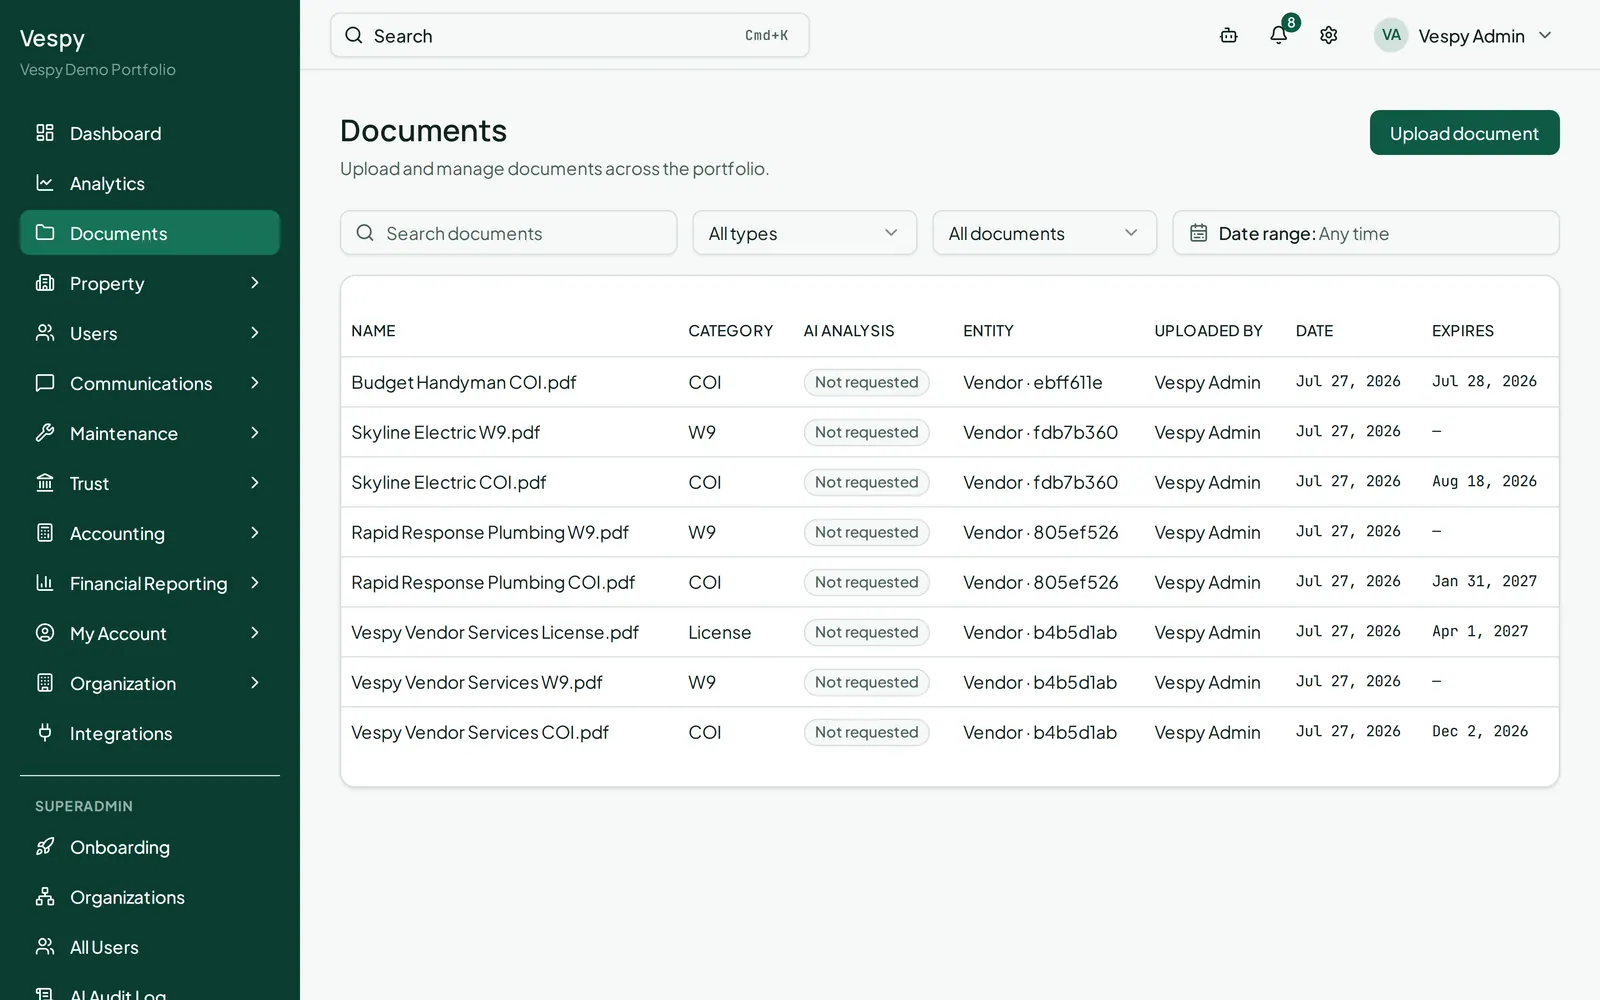
Section titled “2. Find something later”Use the search box (name or category), or filter by entity type and by “Expiring in 30 days” to catch anything that needs renewing soon. There’s also a date range filter on when it was uploaded. The table shows each document’s category, an AI analysis status badge, which entity it’s linked to, who uploaded it, and its expiration date.
3. Open, preview, or download
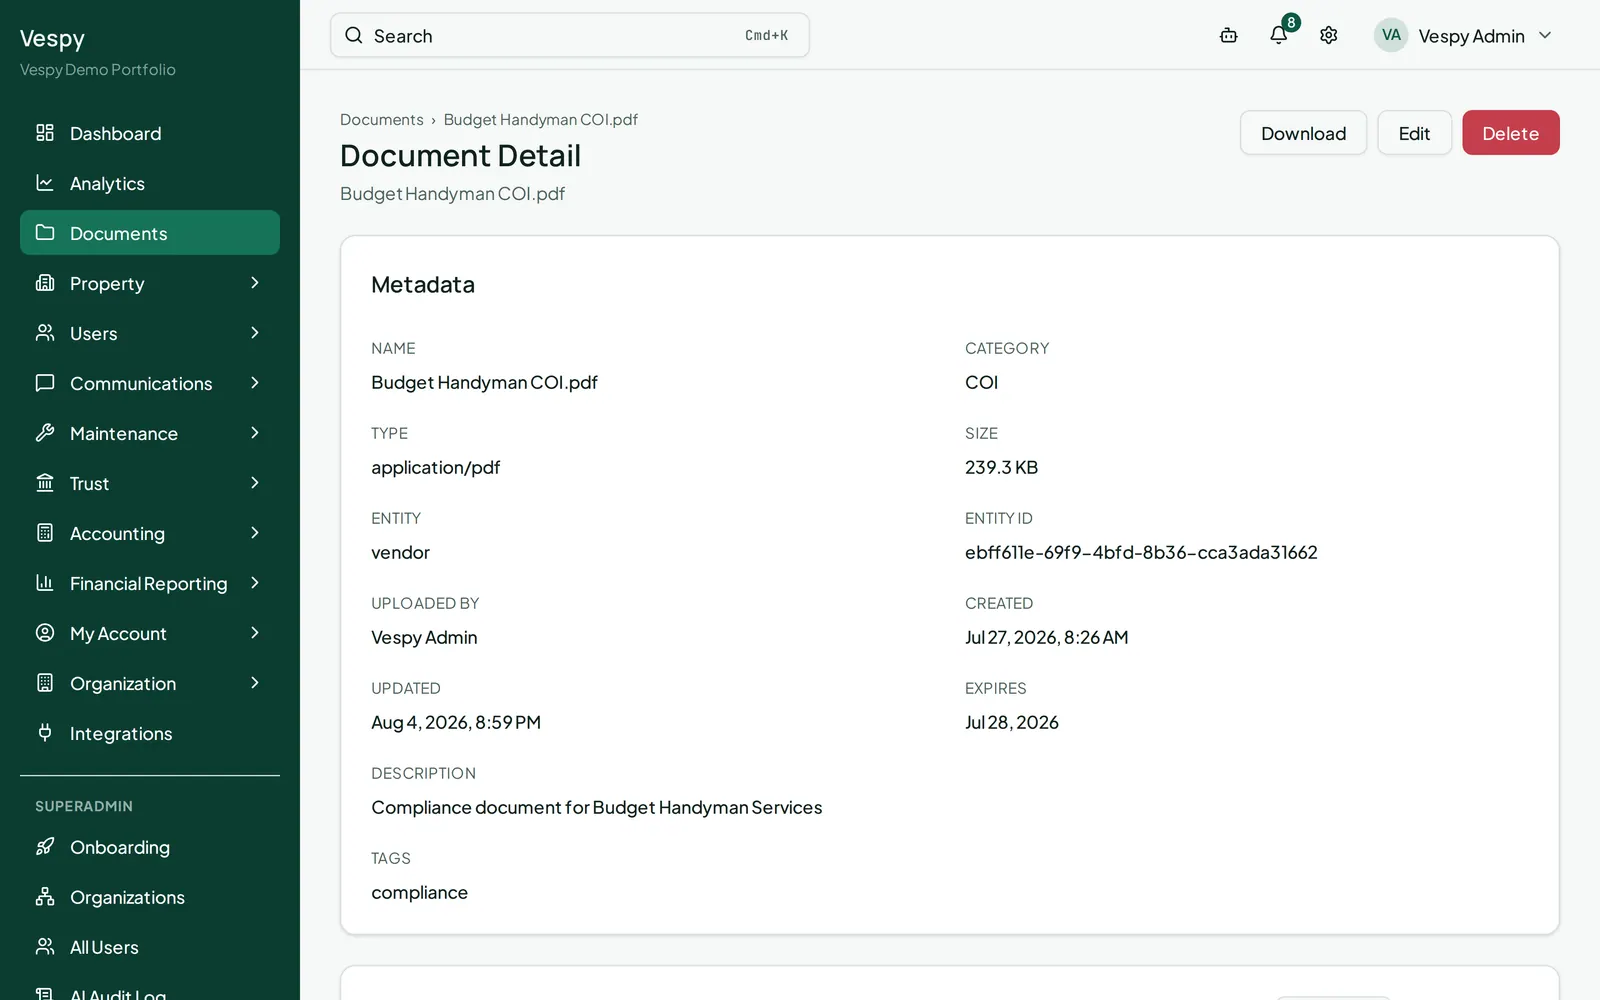
Section titled “3. Open, preview, or download”Click any row to open its detail page. Download grabs the file; PDFs, images, and text/markdown/CSV/JSON files also preview inline. Edit lets you change the name, category, tags, description, or expiration date after the fact. Delete removes it (admins and managers only).
What the AI analysis panel tells you
Section titled “What the AI analysis panel tells you”Every document gets automatically analyzed. For text documents (a lease, for example), you’ll see a classification of what kind of document it is, a plain-language summary, any parties named in it, and key dates it mentions. For images, you get a visual category and a short summary instead.
Afterwards
Section titled “Afterwards”- Adding a vendor and paying them — vendor compliance documents (COI, W-9, license) live in this same library.
- Handling a security deposit — attach photos or invoices as documents, then reference them when recording a deduction.