Onboarding a property
This is the workflow every new Vespy organization walks through first. Nothing else in the platform is useful until a property has units, a unit has a tenant, and a lease connects the two:
property → unit ──┐ ├─→ lease → charges → paymentstenant ────────────┘1. Create the property
Section titled “1. Create the property”Go to Property > Properties and click Create property. Fill in:
- Property name
- Street address, Address line 2 (optional), City, State, ZIP code
- Owners (optional) — select from the ones you’ve already added
- Total units
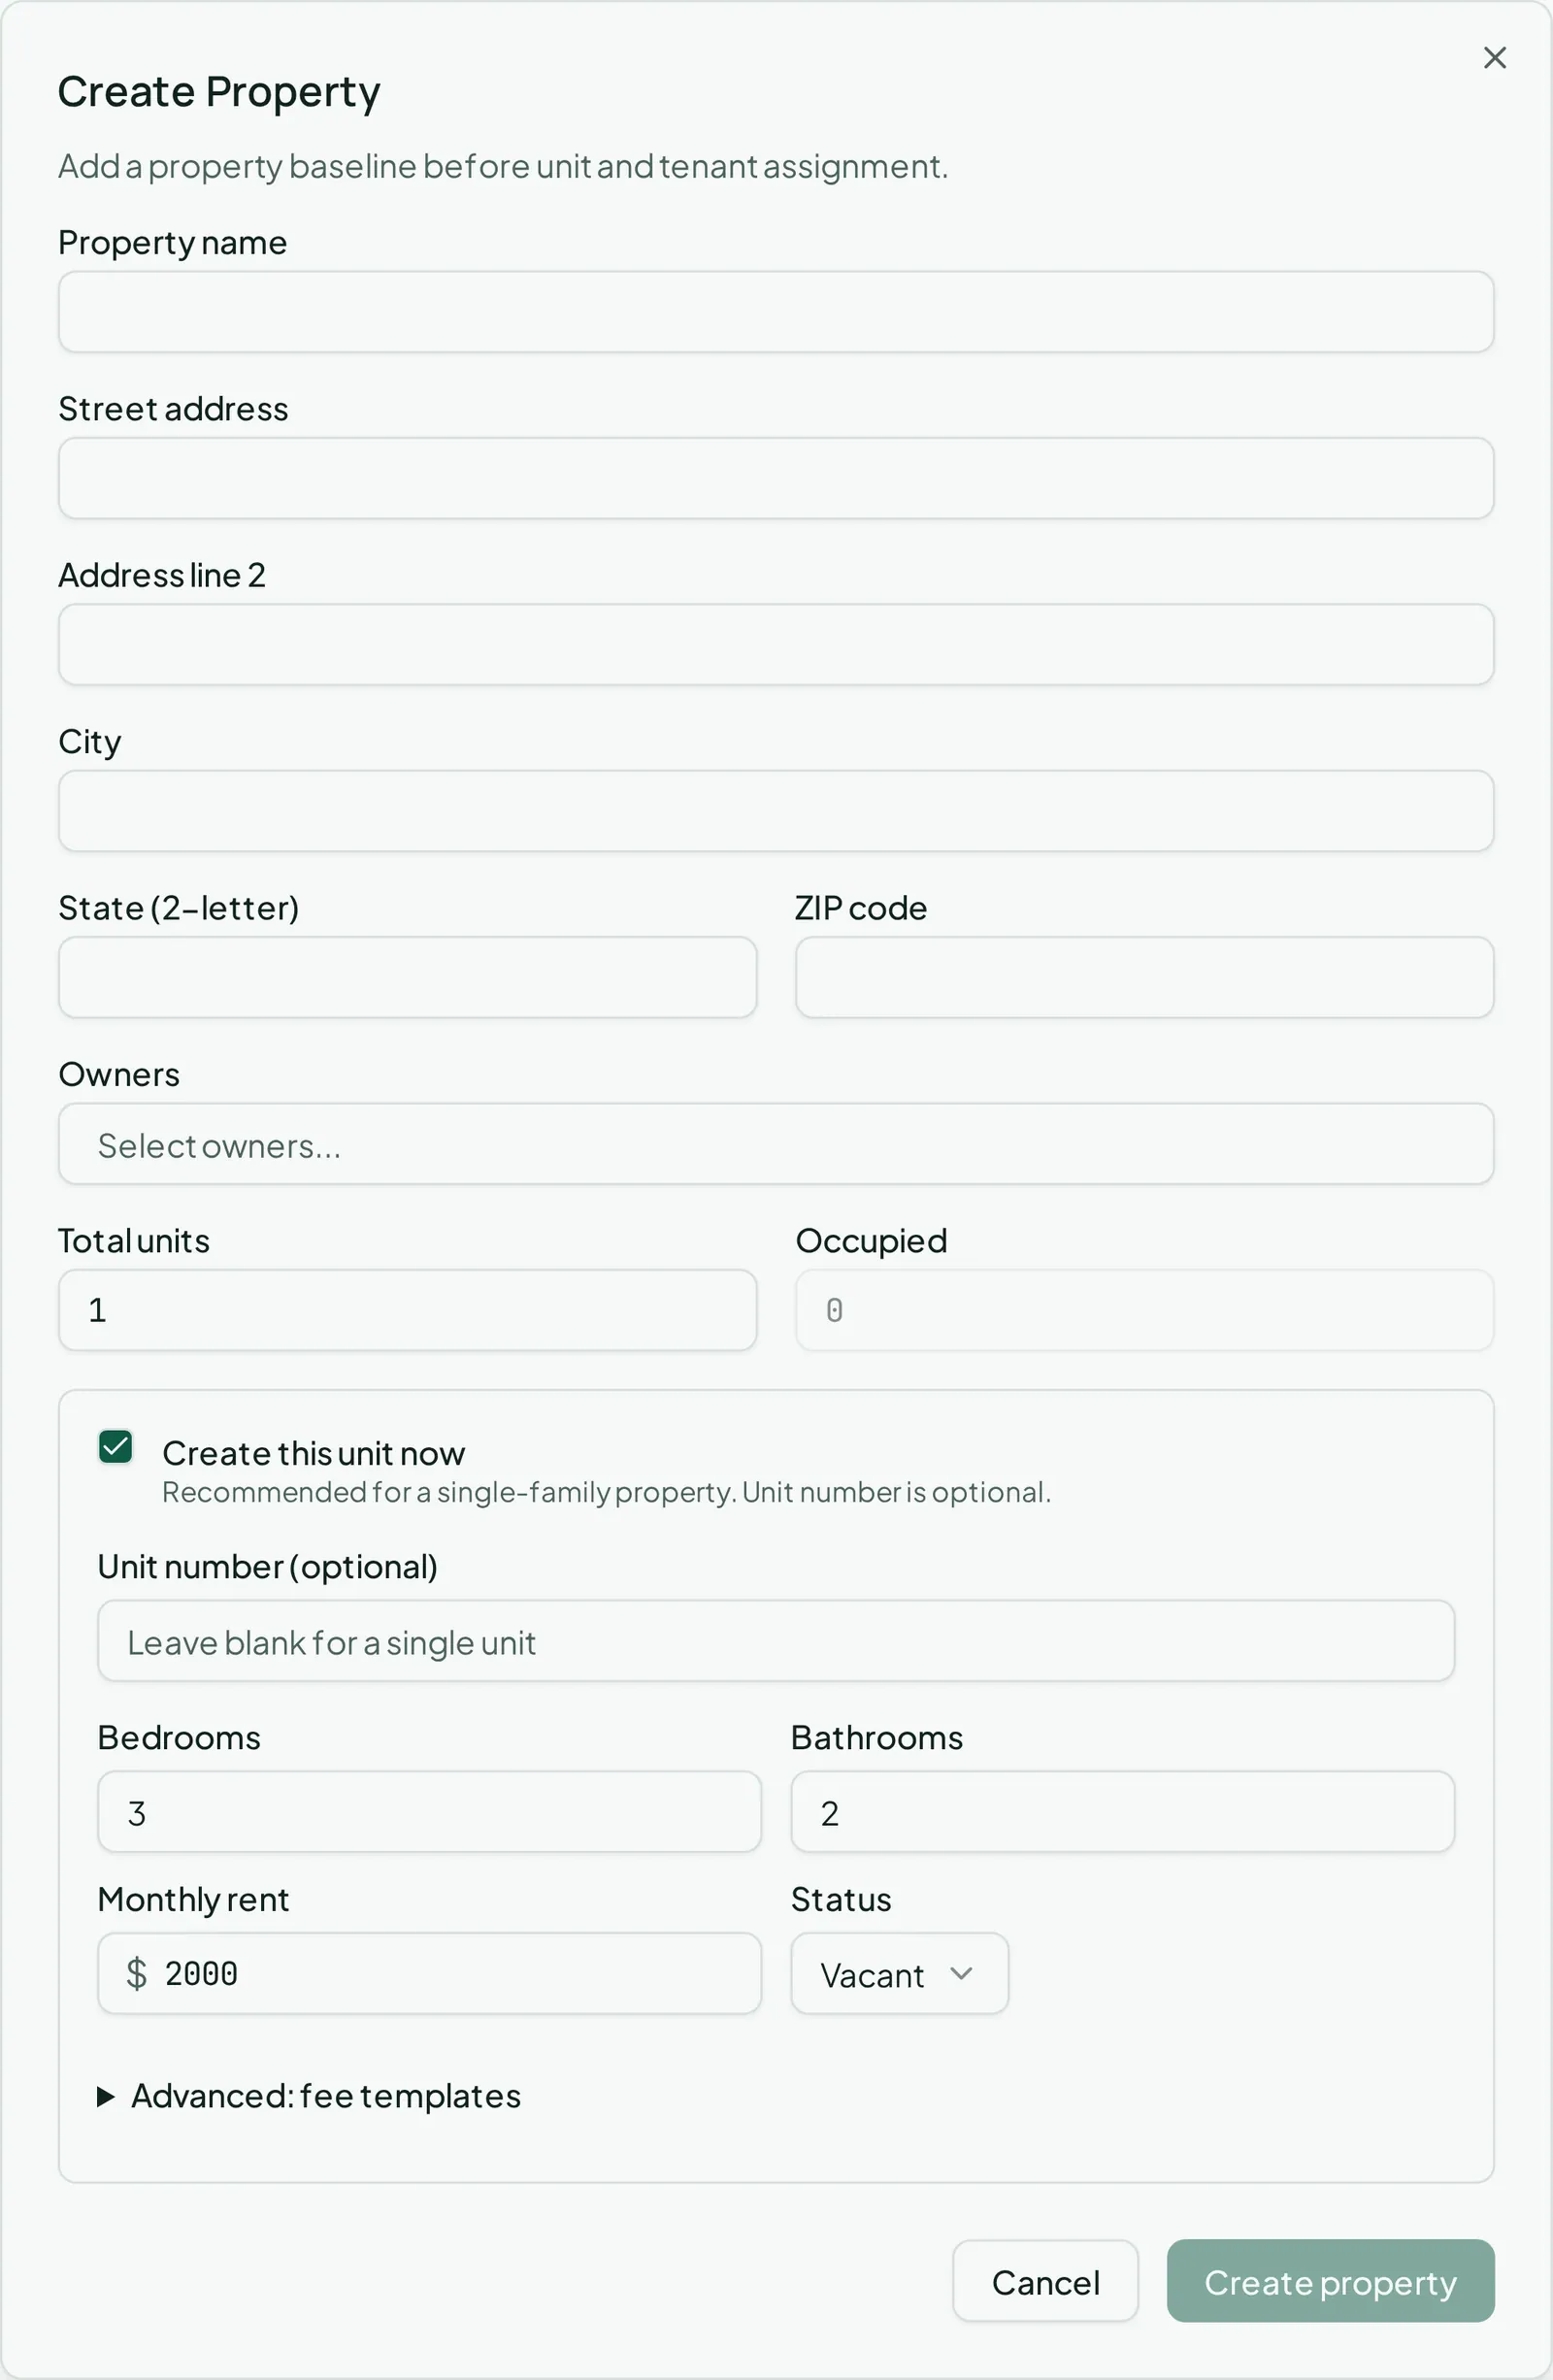
If Total units is 1, a box appears letting you check Create this unit now and
fill in the unit’s details right here — bedrooms, bathrooms, monthly rent, status, and
so on. For anything bigger, save the property first and add units next.
2. Add units
Section titled “2. Add units”If you didn’t create the unit inline above, go to Property > Units and click Create unit (or, from the property’s own page, use the + Create unit link in its Units card — it takes you to the same form, pre-filled). Fill in:
- Property
- Unit number (optional)
- Bedrooms, Bathrooms
- Monthly rent
- Status — Vacant, Occupied, or Maintenance
- Access instructions (optional) — worth filling in now, since any maintenance request opened on this unit later copies these instructions in automatically
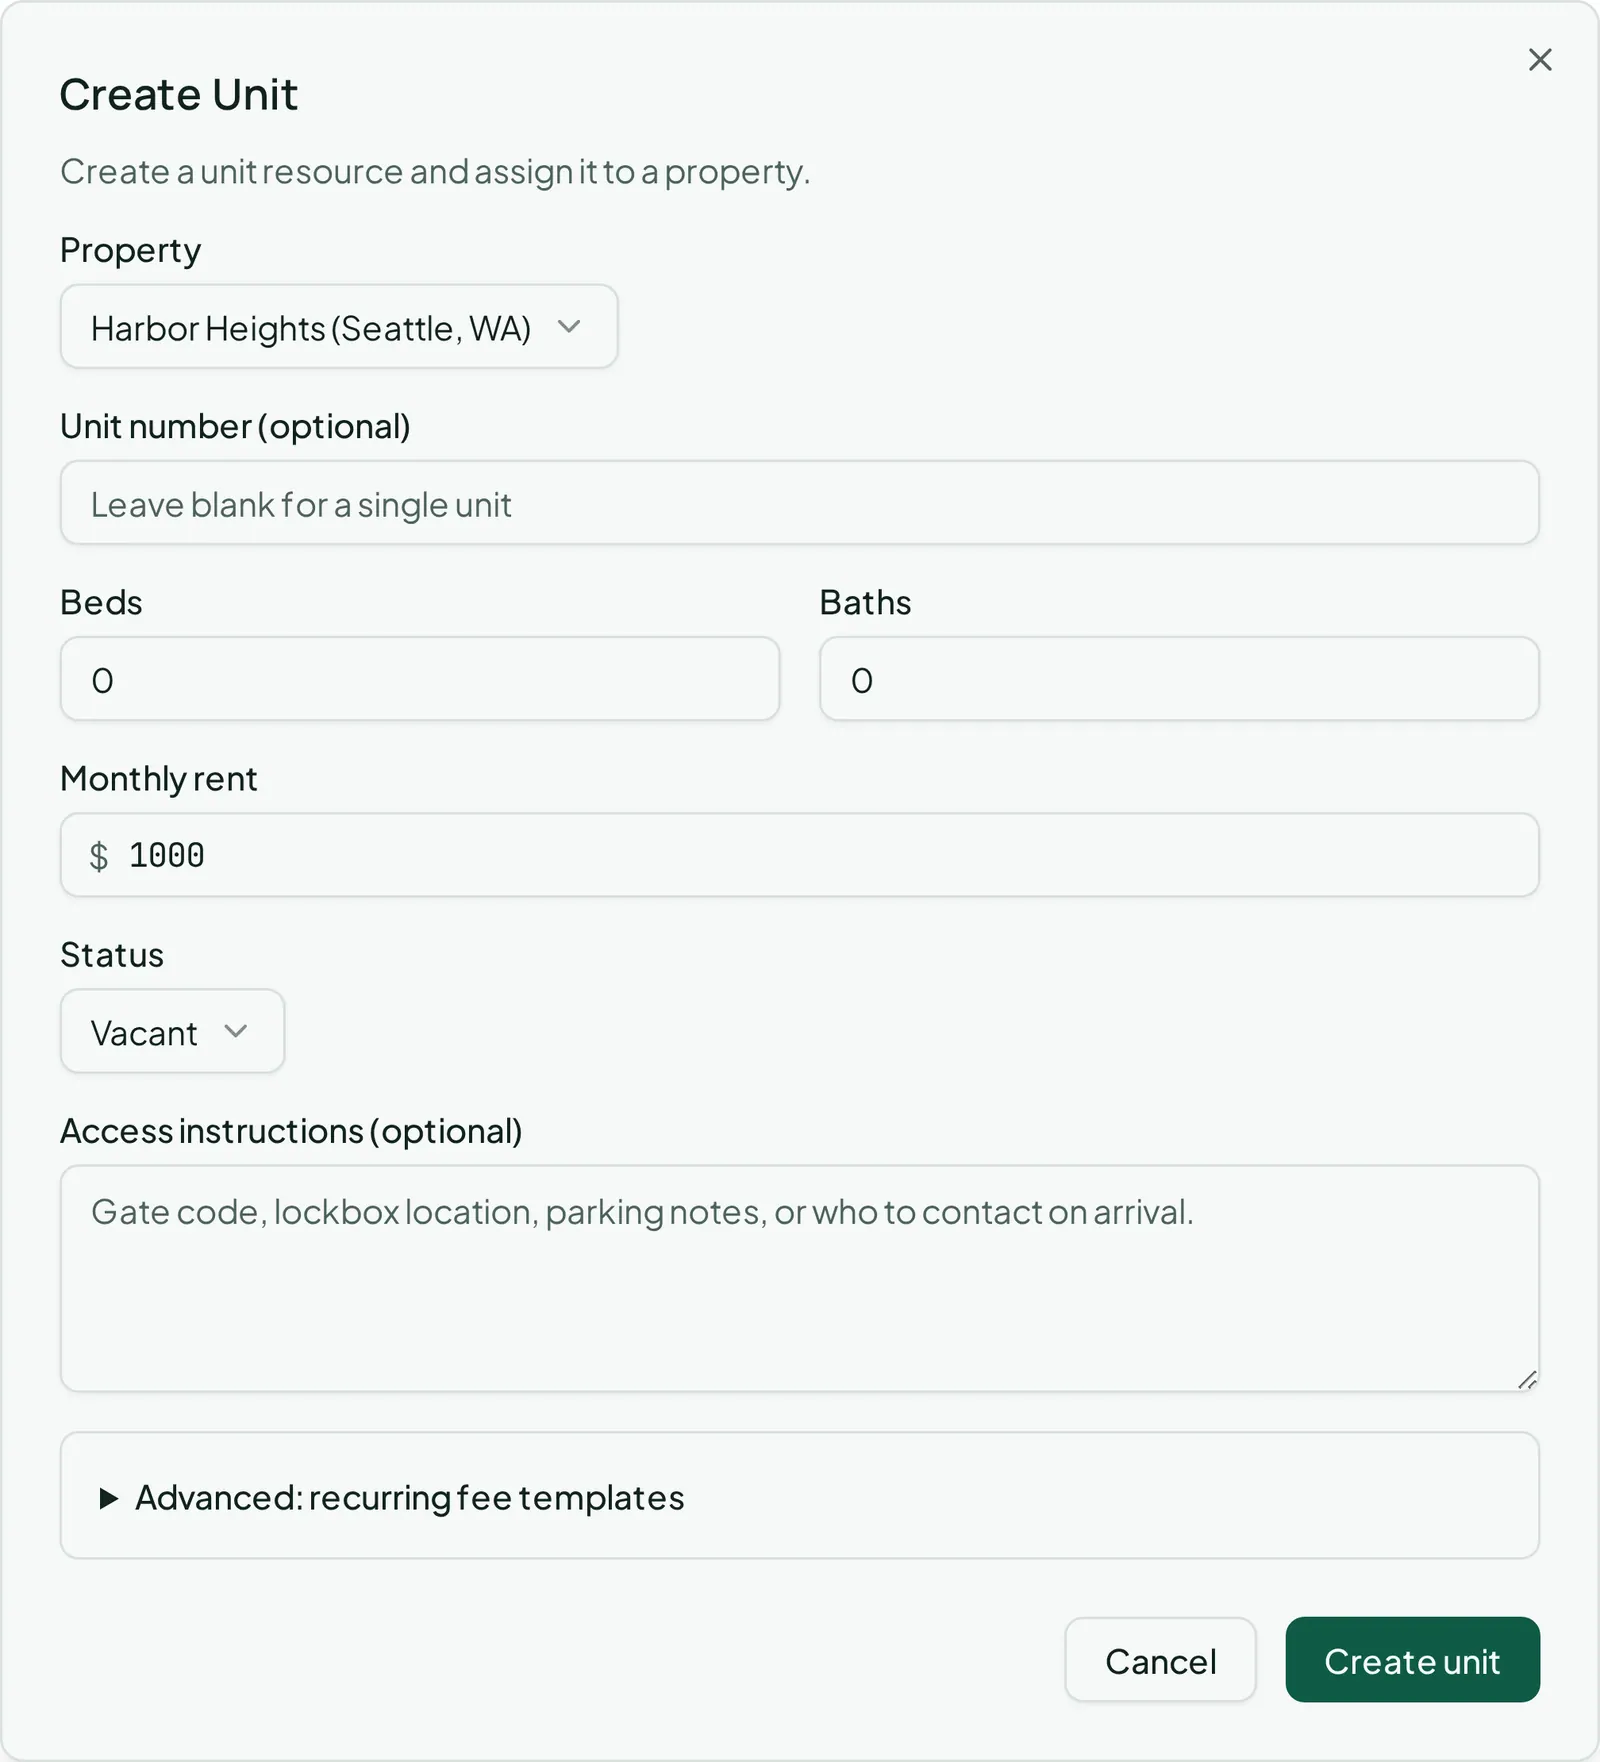
You can also set up recurring fee templates here (a parking spot, a storage locker) that get offered automatically when you create a lease for this unit.
3. Create the tenant
Section titled “3. Create the tenant”Go to Users > Tenants and click Create tenant. Fill in:
- Tenant name, Tenant email
- Phone (optional)
- Preferred language (optional)
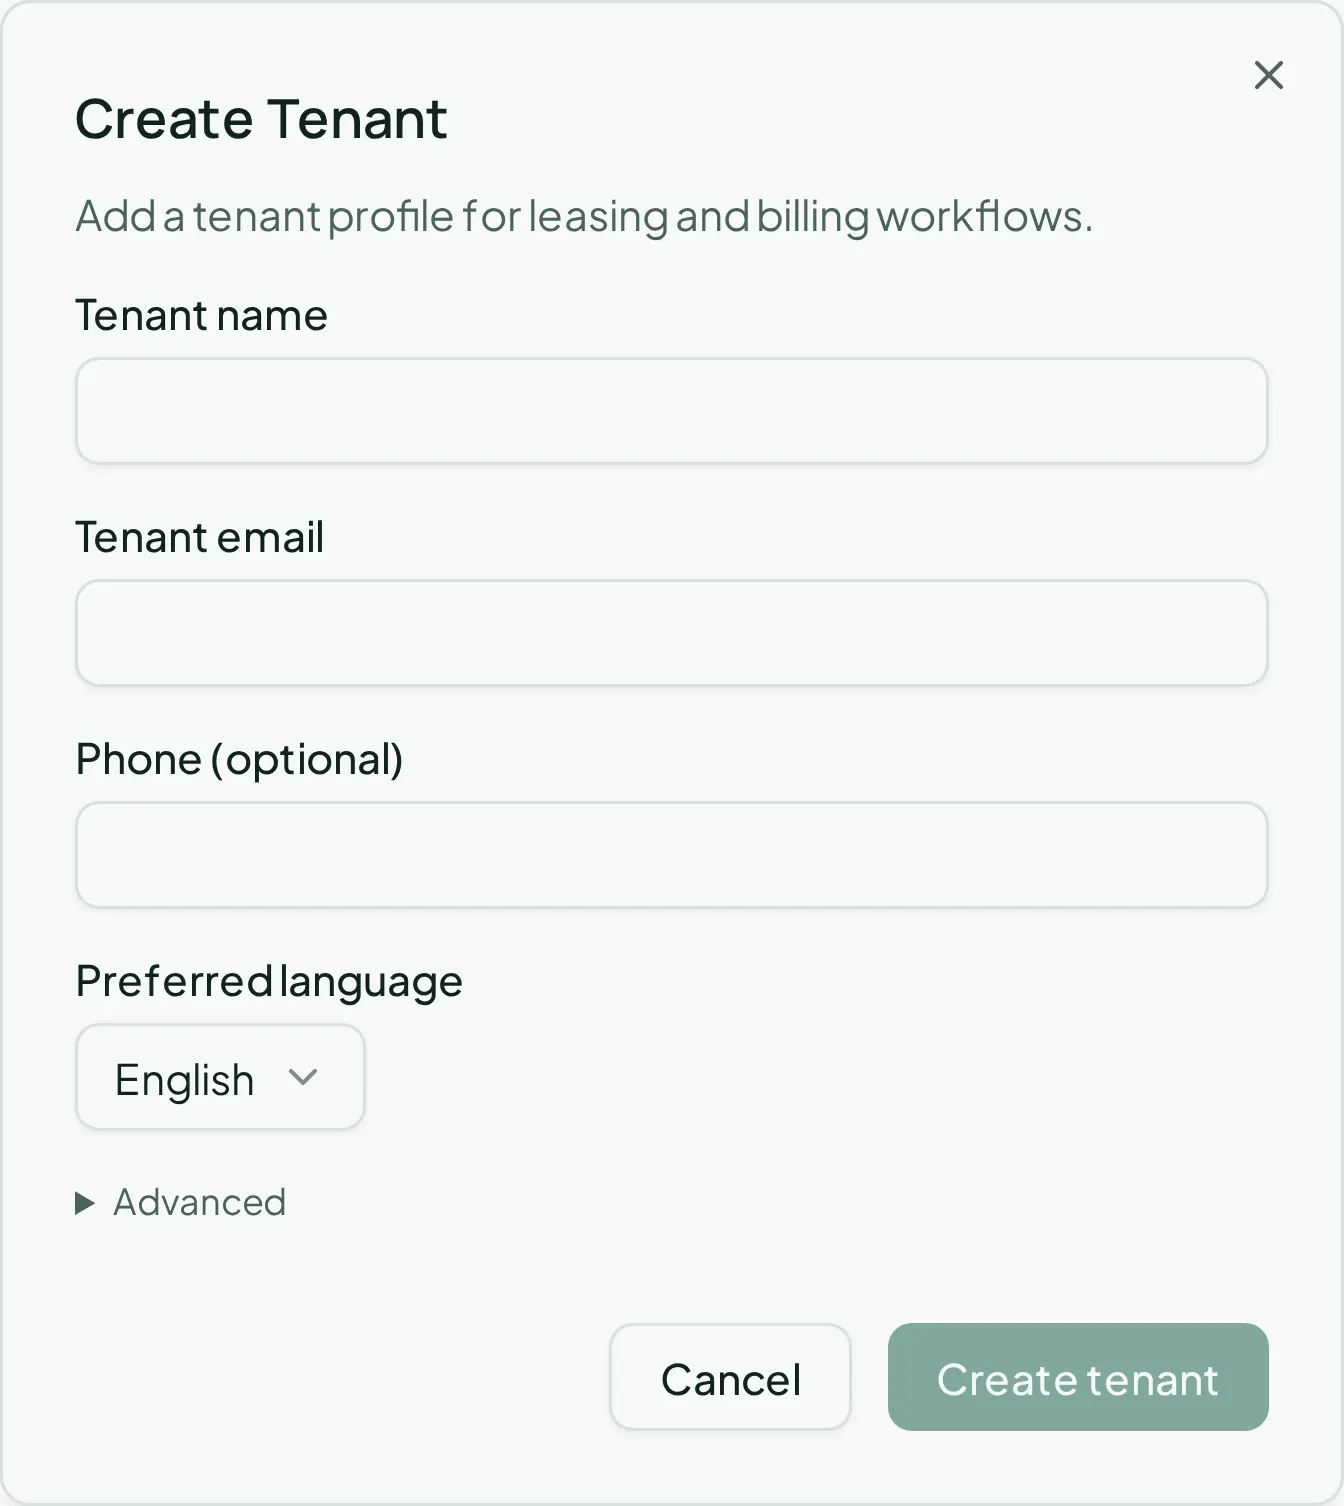
This creates a tenant profile — it does not give them a portal login. That’s a separate, later step: see Inviting a tenant to the portal.
4. Create the lease
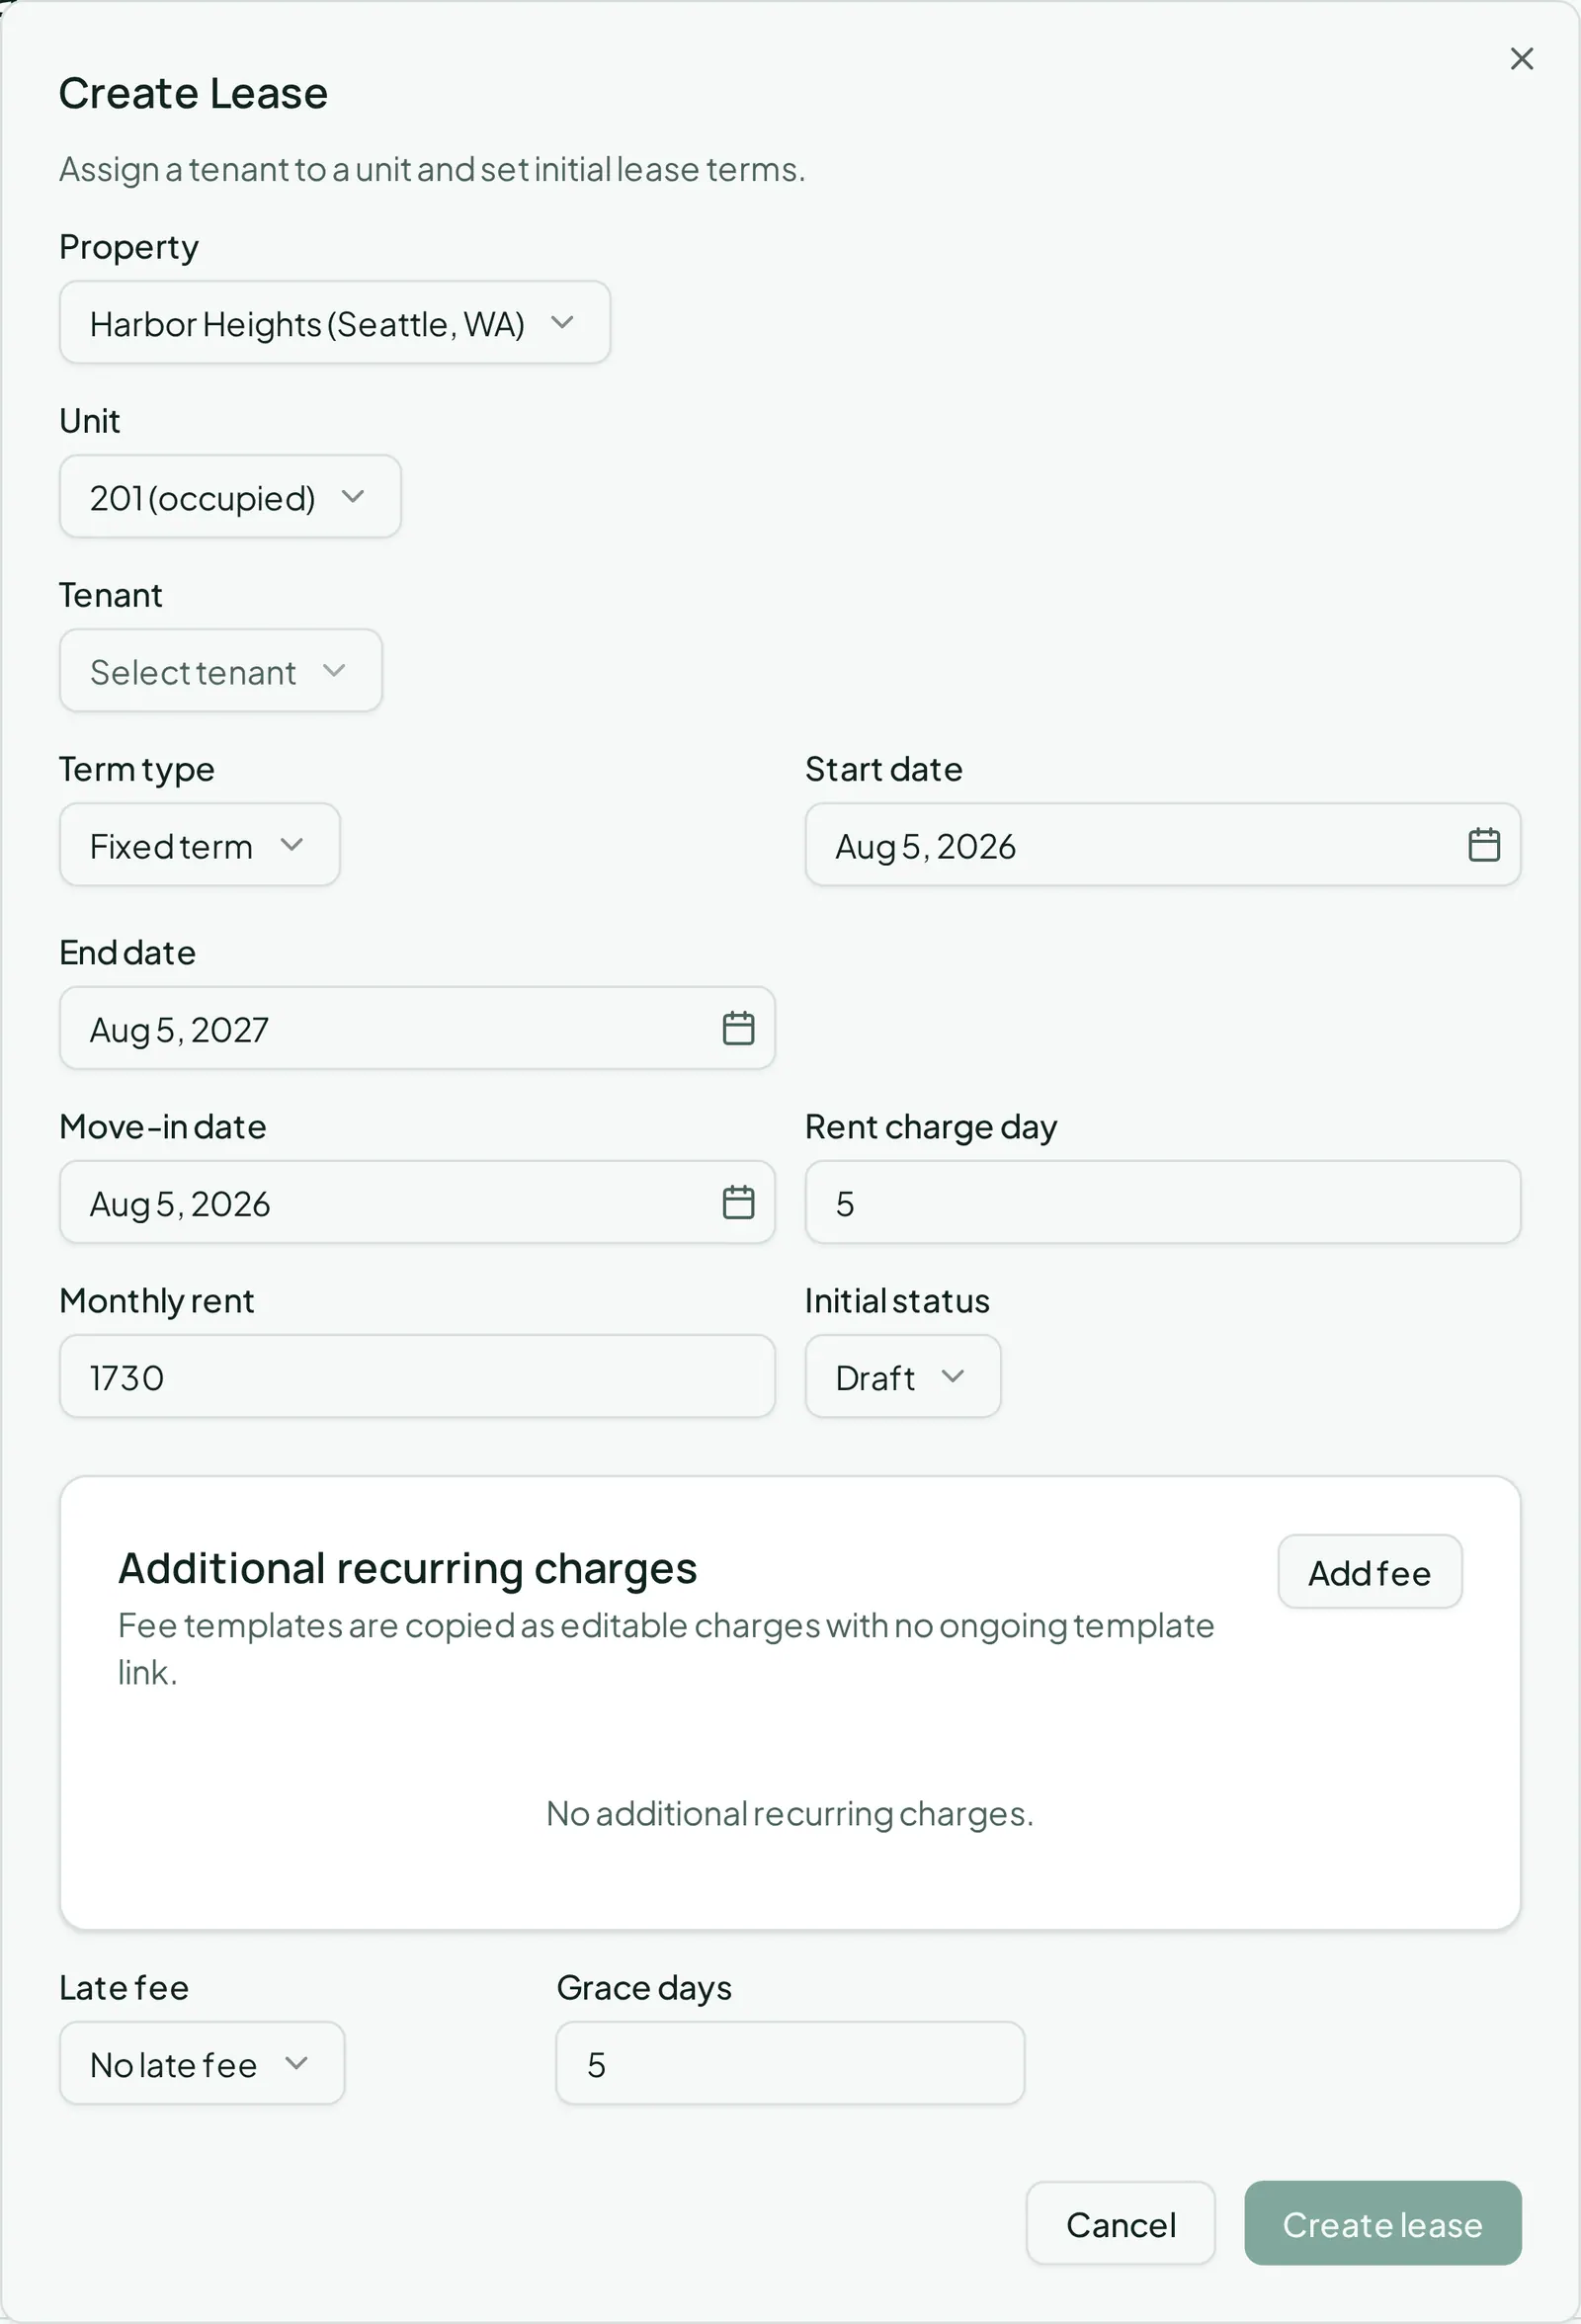
Section titled “4. Create the lease”Go to Property > Leases and click Create lease (or use the Create Lease link from the unit’s page, which pre-fills the property and unit for you). Fill in:
- Property, Unit, Tenant
- Term type — Fixed term or Month-to-month
- Start date, End date (hidden for month-to-month), Move-in date
- Rent charge day — the day of the month rent is billed, driving all future rent charges automatically
- Monthly rent
- Initial status — Draft, Active, Ended, or Terminated
- Any additional recurring charges (parking, pet rent), and a late fee policy
Afterwards
Section titled “Afterwards”- Billing rent and collecting payments — the lease now bills; here’s how to collect on it.
- Handling a security deposit — if you collected one at move-in.
- Renewing or terminating a lease — the rest of this lease’s lifecycle.